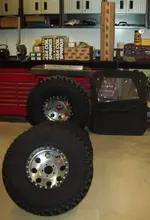
Just another LJ build

G Beasley

Moderator
Staff member
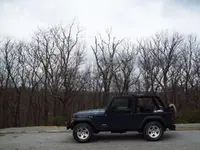
I havent had a 4wd that could be driven on the highway in a long time and I was getting tired of trailering everywhere so I started looking for a LJ Rubicon last Thanksgiving . Within a week I found this with 60k miles for a great deal and it was semi local .

1.webp

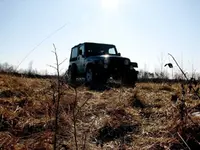
This is the first picture I took of it once I unloaded it from the trailer . The next day I took it out back to have a little fun .

2.webp

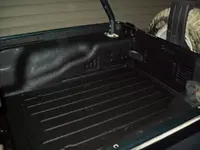
I immediately liked the softer ride than I had in my samurai , but it was lacking some in capability . I knew with some time and research it would be much more capable , but for the time being I contented myself with cleaning it , getting a new top and some Line X .

3.webp

4.webp


I removed everything from the LJ and added a custom milk crate seat . I trailered it over to Line X and then when I got it home I put it all back together just in time to drive up to Lake Erie for work . (Seeing a trailer habit yet )

5.webp

This was the 1st time in 7 years I hadnt driven a dually CTD Dodge on a trip and I really enjoyed the LJ . So I went full bore into researching here on JF and ROF and I ordered up an Old Man Emu super ultimate setup from DPG offroad .
I came home from six weeks on the road and this is what I had waiting for the Rubicon .

6.webp
 
I went ahead and put the 33x12.5 Destination MTs on with no lift just to see how bad it was going to be ...
rubicon2.jpg

TitusvillePATrueValue081.jpg

rubicon3.jpg

Before during and after .

It wasnt driveable but I sure liked how it looked a lot better .

The lift I went with is med OME coils and JKS adjustable short arms . I want to keep my rig low and stable as I want my wife and kids to enjoy being on the trail . I have also gotten older and dont feel the need to make the hard line every time anymore , heck I am just happy to get in the woods away from society on a rocky road .
rubiconlift069.jpg

1st up was the coils so that I could get them in pretty quick and still drive the jeep if I wanted to .
rubiconlift071.jpg

rubiconlift072.jpg

rubiconlift074.jpg

rubiconlift075.jpg

I removed the swaybar links and then moved on to the shock .
rubiconlift078.jpg

rubiconlift076.jpg

Drivers side shock came out nicely , but the passenger side had to have the shaft cut with a cut off wheel
rubiconlift084.jpg

rubiconlift085.jpg

Heres the OME next to the stock Rubicon spring .
rubiconlift086.jpg

rubiconlift088.jpg

rubiconlift089.jpg

rubiconlift090-1.jpg

Next up was to install the bump stop , I think the spring pad is made from depleted uranium as it is thick and took a while to drill . A little cutting oil helped a lot and I used the self drilling screw to cut in the threads .
Once it was all test fit I removed the bumpstop and put it inside the coil spring . Then I pushed it into place with the help of a spring compressor . Once it was in place I reached through the coil with a 1/4" ratchet and ran the screw in .
rubiconlift092.jpg

Next up was to yank the trac bar and drill out the mount .
rubiconlift094.jpg

rubiconlift095.jpg

Impact chisel with a pickle fork adapter is your friend .
rubiconlift097.jpg

Wrestled the drill into place and drilled the hole out .
rubiconlift101.jpg

The other side came out easy and it went back in fine .
 
rubiconlift106.jpg

rubiconlift108.jpg

rubiconlift105.jpg

rubiconlift110.jpg

rubiconlift109.jpg

Rear spring and shock swapped out . I got lucky and all of the bolts came out pretty easy .
rubiconlift115.jpg

rubiconlift118.jpg

rubiconlift120.jpg

rubiconlift122.jpg

rubiconlift119.jpg

Heres the antirock swaybar links cut down and with the threads cleaned up . I am running a lower lift height than the antirock is designed for and thats why I had to trim the links .
Went ahead and installed the JKS arms which now live on in Sundowners rig .
rubiconlift123.jpg

It went well once I ignored the directions . The directions said to remove one arm at a time and , but I found it much easier to swap them in pairs .

The rear trac bar went in at the same time and it was perfect the first try . I was very happy to say the least .
rubiconlift093.jpg

I swapped the front arms out in pairs and it went pretty nice too
100_7107.jpg

This is what it looked like with the suspension and body lift finished . And this is where it stands for now . I have a Savvy gas tank skid ready to go in and I am going to bend up a cage next . I will post more pics when I make some more progress .

The only thing left to buy is the Savvy under armor . I am making my bumpers and sliders and then its finished ... hahahahahaha .

I have been driving the LJ more and more and last night I took my family out in it for the 1st time to go see the fireworks . On the way home a deer leapt in front of us and went into the grill .
IMG_1979.jpg

IMG_1978.jpg

IMG_1977.jpg

IMG_1975.jpg

I think I may try to put the inner section of a CJ grill out and weld it into the now bent TJ grill . The fenders are going to get cut flat and I have a new bumper ready to weld up .
Flatfender15.jpg

I got the antirock on last month , no complaints with it at all . Pretty easy to install and I dont notice it on the road . Best of all no more disco'ing when I get to the trail .
Flatfender1.jpg

Started out by measuring ten times and drilling the holes for the JK signals .
I used a 3 and a 1/4" holesaw and it was the perfect size for the housings I got from Rock Auto .
Flatfender2.jpg

Fished the wires back through the newly drilled and painted signal hole . I was able to use an existing hole for the wires .
Flatfender3.jpg

I used a sawzall blade with light pressure to cut notches in the light flanges so I could index the lights to tighten them and not use silicone to hold the housings in .
Flatfender4.jpg

Here you can see the notch . I offset the slots in the grill so these go in then twist an 1/8th of a turn . They are very tight but fit great .
Flatfender5.jpg

The first light is in and wired .
Flatfender6.jpg

Deer damage getting ready to go away .
Flatfender7.jpg

Detail of the wiring , there was plenty of length for the fog light connection . I used an existing hole on the bottom of the grill to drop the fog light wiring through . If I didnt have body lift this would have been a tight fit .
Flatfender9.jpg

I painted all the exposed surfaces with Mopar touch up paint . It blends in pretty nicely .
Flatfender8.jpg

Heres the drivers side wiring all snaked through . I did have to pull the coolant reservoir to gain access to the hole to snake the wiring through.
Flatfender10.jpg

Passenger side completed .
Flatfender11.jpg

Flatfender12.jpg

JK turn signal install completed .

Flatfender14.jpg

Time for some tube work .
http://i386.photobucket.com/albums/oo305/sammi_davis2/jeepparts031.jpg
jeepparts030.jpg

jeepparts029.jpg

Custom duct tape mock up . I bent up the front hoop and got it all fitted to the bumper plate . The duct tape lets me stand back and look at the position of the tubing as I go along . Hopefully tomorrow I will get the two other tubes notched and tacked in place . Then I can pull the entire assembly off and finish welding it .
bumper1.jpg

bumper2.jpg

Even with a tubing notcher these joints were a pain .
bumper3.jpg

Fitted and tacked in place .
bumper35.jpg

Mostly welded .
bumper4.jpg

Should have started on the front so my ugly stop start would be on the back .
bumper5.jpg

Cutting the D Ring hangers .
bumper6.jpg

All welded up and ready for primer .
bumper7.jpg

bumper9.jpg

And the finished product . I still have to paint it as right now its just primered , but beyond that it is done . Now on to rollcage , but thats going to have to wait until I make it home again .
 
I didnt take any pictures of me pulling the deer damage . I used a ratchet strap to pull against the bumper and I got it mostly pulled out . Thanks to Jakes unused chrome grill you cant tell a deer attacked the LJ anymore .
Jeepbling001.jpg

Lining up and cutting the turn signal homes was a challenge . I ended up scribing them with a 90 degree scratch awl . I then drilled a hold and used a set of good sheet metal snips to cut out the holes .
Jeepbling009.jpg

I picked up a stick of angle iron this weekend to start the new crossmember project . I am going to make a triangle shaped crossmember with a frenched in receiver and d ring hangers . Once thats done I am going to add some tubing to go around the corner of the tub . This should help a little with the departure angle and it gives me an excuse to use the plasma cutter .
Bolandsbanners009.jpg

Not much tech , but I did get my new stickers done . I like the old Renegade script as I daily drove one when I was younger . So with the flat fenders and cj style turn signals I went with this . I also am making some of the old school Willys 4wd stickers too .

If I get lucky I might get my hood repainted this weekend ... but I am betting on having to knock out some honey dos .
garage006.jpg

After checking out the sticker on the hood I decided to add 5 more inches to the length to better fill the area . New stickers should be ready this week .
BolandsTrueValue138.jpg

Got the spare mounted up , and my 4wd sticker I made on . Also finished up the mirror mover , I will post pics of that once its painted . I am going to try to weld up the cage this week . Then it will be off to Utah for work .

Havent had much time for fabrication , though I do have the cage ready to go . Just havent had the time to put it in . I did get the OPDA swapped out today .
opda002.jpg

opda005.jpg

opda007.jpg

It didnt look as bad as some I saw in the OPDA thread http://www.jeepforum.com/forum/f9/20...ilure-1144202/ but it did have some wear . I used WilyDiggers youtube video as a reference and it helped out a lot with the swap . If you are on the fence about swapping yours out dont be worried . It is just as easy as the video shows it to be .

Finally had time to wrench some over the holidays .
Jeep003.jpg

Jeep004.jpg

The old z linkage is out . I found the plastic bushings difficult to remove . My solution was to
use a serrated edge knife to cut one side off the bushings . Once I did this they pushed out easily .
Jeep006.jpg

Jeep008.jpg

Heres the Novak cable shifter in place . The hardest part of the install was removing the old linkage . The install is more or less self explanatory once you get underneath and look at where the hardware goes .
Jeep009.jpg

Jeep011.jpg

I listened to what a lot of the other people in the Under Armor thread said . It went together pretty easily and I think it will go under the Jeep pretty easily . I am going to have to modify the front mount as I am running Brown Dog motor mounts .
Started installing the Savvy Under Armor today . It went together fairly well . I really only had to fight the exhaust as it just didnt want to go up . With some massaging it now fits and clears the lower passenger side control arm mount .
Underarmor001.jpg

When I pulled this measurement I thought to myself how much is this really going to go up ?
Underarmor003.jpg

Once I got the crossmember in and everything bolted up I was shocked at how much higher everything went .
Underarmor004.jpg

I used a 36 mm socket and it fit over the hump on the t case perfect . With a few lifts of he jack it made a nice sized indent for clearance . I had to use a crowbar after I took this picture for some additional clearance . I will start it up tomorrow to check for exhaust clearance and vibrations from the t case .

More pics to come tomorrow .
Underarmor001.jpg

When I pulled this measurement I thought to myself how much is this really going to go up.
underarmor2005.jpg

Well to answer my own question it goes up a little over three inches .
underarmor2008.jpg

I did not like the factory location of the rubicon locker pumps . So I rewired them and added in some vacum line .
underarmor2003.jpg

I moved the pumps under the hood onto the ABS tray .
underarmor2011.jpg

Side view of the under armor and the disappearing t case .
underarmor2018.jpg

I still have the stock driveshaft under it , how do yall think the angle looks ? After an extended test drive I didnt have any vibrations from it ? I do have some vibrations from the exhaust at idle but most of it goes away once I accelerate . The passenger side lower control arm is super close to the exhaust and I think it may be hitting intermittently ? I cracked the muffler yanking it around so I am going to go to the exhaust shop this week . Once its on the rack I think I am going to shorten the elbow next to the lca and put in a new muffler .

I have the main skid in place , but thanks to the Brown Dog motor mount lifts I have to do some fabrication .
underarmor2019.jpg

I chopped up a piece of c channel to start .
underarmor2020.jpg

I put it up on the drill press and then tapped the front mount holes . I am not sure this is the route I am going to go yet , but its a start .
 
underarmor3007.jpg

This flex head socket will save you a huge amount of headaches on the passenger side inner motor mount bolt . It is difficult to reach with a regular socket , but this popped right on .
underarmor3001.jpg

I tried to re-engineer the brown dog lifted motor mounts to work with the under armor front mount . I made the 1st bracket and figured out how to make it work , but the passenger side was going to see a huge amount of shear . So for now I pulled the brown dogs and went with the savvy mounts .
underarmor3002.jpg

The front mount was tough to get in and I was glad to have a buddy here to pry bar it over . Once he put a little pressure on it I was able to get all four of the bolts in the motor mount blocks .
underarmor3004.jpg

Once the bracket was in we got the surfboard in place . Horray !
underarmor3011.jpg

It didnt take me long to figure out my fingers werent going to fit on the bakcside of the oil plug cover .
underarmor3010.jpg

I made this plate and tacked the four nuts onto the plate . Next up was a finger hole to be able to get it into place .
underarmor3014.jpg

Heres the plate in place . Its simple and the nuts keep it all lined up . Light pressure is required for the first screw because all thats holding the plate in place is gravity .
underarmor3016.jpg

All buttoned up . The plate I made makes for a super easy removal when its time to change the oil
underarmor3017.jpg

Drivers side wing is on , but I am not going to put the passenger side wing on until the new muffler goes on .

Overall I am very happy with the Under Armor . It takes a while to put it in , but the end result is so worth it . Still trying to decide if the rear driveshaft is going to work or not . I have had it up to 55 and no crazy vibes ?

winchfairlead.jpg

Got a fairlead mount cut out today from an old multi mount , but thats about all . I had grand plans , but my wife had honey dos .
jeepblackbumper.jpg

I got the rest of the welds cleaned up and the first coat of paint on . I also cut out the rest of the fairlead mount and a gussett . I didnt get pictures of the metal work . Hopefully next weekend when I get back home . For now its just a picture of the tubework in black .

Finished up the fairlead tonight . Decided that I wanted the fairlead to be square to the winch .
jeepparts004.jpg

I used the sawzall to make two vertical cuts . Then I used the vice with a large crescent wrench to make the bends .
jeepparts006.jpg

Then it was over the bandsaw to cut two filler plates .
jeepparts007.jpg

All welded up and smoothed out .
jeepparts009.jpg

Another view of it welded up .
jeepparts010.jpg

All fitted up to the tubing .
jeepparts012.jpg

Fully welded and getting prepped for paint .
jeepparts014.jpg

Painted and installed . I had to machine the aluminum fairlead to match the angles of the bumper , but everthing clears and fits nice .

Tomorrow I will finish mount the winch and moving the solenoid box . The box doesnt clear the lower tubing so I am making a bracket to mount it vertically .

I am almost ready to start the cage , but I need to go get a few sticks of tubing first .

I had a few persistent exhaust rattles after I installed the Under Armor . No matter how I adjusted the hangers and mounts it would still rattle . So I was off to the exhaust shop and this is what we came up with .
jeepbumpers009.jpg

The flex coupling should take some of the stress off the exhaust manifold and it also let us get everything lined up .
jeepbumpers011.jpg

Next up was mounting the winch .
jeepbumpers004.jpg

The winch control didnt clear the tubing so I made a lift for it . I took a piece of 1.75 hrew and cut 1/5th out of it . I used the anvil to flatten it so it would not slide . As an added saftey I cut two pieces of vacum tube to length and split them . The vacum tube slipped onto the bottom of the tubing and it is nice and secure .
jeepbumpers005.jpg

jeepbumpers006.jpg

jeepbumpers001.jpg

And a few pictures of the mostly completed bumper and installed winch . I think I am going to get a saftey thimble and also weld a loop for the winch hook to hang from . Still need to sew up a cover for the winch too , but thats for another day .
 
We are heading to the beach this weekend and my wife wanted to use one of the baskets that attaches to a receiver for the kids beach stuff . Theres one problem , I dont have a receiver , so out came the bandsaw welder and grinder .
jeepbumpers008.jpg

I am using 3"x3" 3/16th angle iron with 3/16th flat bar to make a triangle shaped bumper .
jeepbumpers013.jpg

All of the holes are drilled and the bolts are ready to be tacked in place . All of the fasteners will be hidden on this bumper .
jeepbumpers018.jpg

All welded up , it took a while as I had to skip back and forth to avoid warping the bolts but it bolted back up perfectly .
jeepbumpers019.jpg

This is the flat bar I am using .
jeepbumpers022.jpg

And this is the first of the plates that will make the triangle . I knocked the corners off a little , but I think I may go back and cut more .
jeepbumpers023.jpg

Cardboard corner template .
jeepbumpers024.jpg

Carboard meets 1/8th steel . I am using the 1/8th on the corners as it is much easier to bend around the corners yet is still plenty strong covering such a small area .
jeepbumpers025.jpg

jeepbumpers027.jpg

All welded up . As I mentioned above I think I may go back and cut more off sort of like the Warn bumper . It just seems too chunky to me . I am open to ideas post away . I hope to weld in the receiver tomorrow and get the LJ ready for Carova . Thats all for tonight ...

I had a little indecision with the bumper this afternoon . Then the sawzall and I made a decision ...
bumper222001.jpg

I made a few lines while it was on the jeep to see which angle would look the best to me .
bumper222002.jpg

And this is what I took off .
bumper222005.jpg

I cut out a endcap after making a cardboard template .
bumper222006.jpg

This is the endcap tacked in place .
bumper222008.jpg

I used a small ball peen hammer to work the metal into place as I tack welded the perimeter .
bumper222010.jpg

The ends are fully welded , and the receiver is tacked into place . I am going to french the receiver into the bumper sideways and drop the pin in from the top . I will have to drill the hitch , but it will allow me bury the receiver flush .
bumper222012.jpg

From the side , I am happy with v 2.0 so far . Still a lot more welding to go .

I didnt get the LJ completed in time for tomorrows trip , but we have the Grand Cherokee as a backup . The next four weeks will have me out of town , so I will have plenty of time to think through what else I want to weld up on the bumper .

When I bought my LJ almost three years ago the paint on the hood was terrible . Lots of crows feet and a good sized dent from the previous owner having a piece of wood fly up off the interstate .

I was a little worried that the rest of the paint may get similar crows feet , but it hasnt so I decided to get the hood painted . I have shot paint in the past but I wanted this to look as good as the rest of the LJ so I got a few references and this is where it is as of today .
hood1.jpg

It should get paint tomorrow , then back on the LJ on Friday when I get home . I did get the M 416 cleaned up a little last weekend and I also started cutting up the two spare tubs to make my own jeep trailer . I didnt need the 416 , but I sure wanted it .  10 more days of crazy travel and I should be home for a few weeks to make some progress .
hood3.jpg

hood4.jpg

The new basecoat is on and getting ready to be buffed . Still have the black inlay then the clear coat / flat coat center . I think it is going to look awesome when the retro rubicon stickers go on . Hopefully it will be finished and back on the LJ this weekend .
hood5.jpg

hood6.jpg

The hood is painted ! Woo Hoo , just like my old 73 Renegade was . At this point my wife is calling it the retro rubicon , and I kind of like how that sounds . More to come yet , especially now that I am home for a month .
0504122203.jpg

IMG_2008.jpg

IMG_2012.jpg

I didnt make the stickers , but the design is all mine . I am pretty stoked with how they turned out .

More pics to come later tonight .
 
I didnt realize how tired I was last night until I looked at the pictures of my cuts ! I have traveled non stop for the last four weeks and I think it all hit me last night.
LarchmontTrueValue083.jpg

LarchmontTrueValue084.jpg

Shaky cuts and the knockout .
LarchmontTrueValue087.jpg

After a lot of die grinder work .
LarchmontTrueValue089.jpg

Rear crossmember cut so that I can french the receiver into the frame .
LarchmontTrueValue090.jpg

Receiver in place and ready to be welded up . I hope to finish up the majority of the bumper tomorrow .

I just finished welding the rear bumper and much to my dismay it has pulled . I ran too much bead at one time and the result is a slightly warped bumper . I am going to put it in the 40 ton press and see if I can get it close to true ... pics to follow .
bumper009.jpg

Receiver in and welded up .
bumper012.jpg

bumper013.jpg

bumper014.jpg

Metal plate all cut and fitted .
bumper015.jpg

It took two passes to fill the gap , sure made for a lot of grinding .
bumper016.jpg

bumper019.jpg

Installed ! It took 30 tons of well applied pressure and I was able to spring the bumper back into place
bumper020.jpg

bumper023.jpg

Tie in brackets fitted and welded . I will get them installed when I get back home at the end of the week .
driveshafts004.jpg

New rear 1350 CV with long splines from Carolina Driveline out of Spartanburg S.C. I was working in the area and I called them on Wednesday and this was ready for me Friday morning . Harry was awesome to deal with and even rebuilt my stock shaft while I was there .
driveshafts005.jpg

Rebuilt now fully serviceable front . It also got a new slip and splines as the old one was worn out . I have been having an odd whirling noise for a while and I hadnt figured it out . Harry pulled the front and I went off to BoJangles for a biscuit . As soon as I got to speed there was no more whirling noise. By the time I pulled into BoJangles Harry was calling me to tell me the shaft needed more than a new CV center . In 45 minutes he had it completley rebuilt and ready for me to go . Fantastic service , great price and a fellow Jeeper .
driveshafts006.jpg

Last but not least is the new hood stickers are on . I still have to get the cowl section installed , but they should be here next week . This is the third version of this sticker , and I think its a keeper .

As mentioned above it looks like I am going to Utah for work and this time I am going to drive the LJ out so that I can wheel after work and spend a few weeks wheeling through Utah and Colorado on the way back . I have to get the cage completed and the steering fixed . The cage is mostly bent up and ready to be welded , the steering is still out of stock at Savvy . I am considering beefing up the stock stuff for now and getting the Savvy stuff later . I am off for two weeks , hopefully I can get everything ready in time and still spend some time with my wife and kids .

I got the new front driveshaft in with no issues , so I decided to move on to the rear . The new u bolt style yoke went on with no problem , so far so good .
pinionhades002.jpg

Then came my pinion adjusting Hades . I set ( or so I thought ) the ride height on the frame and the axle . Then I kept one jack under the center section as a safety and one under the pinion to slowly adjust the pinion angle up .

All went well and I hit the magic # of 14 degrees . In addition to the magic # the center line of the pinion pointed dead center at the transfer case output . I decided to set it back on the tires and double check the angle before I snugged everything up . Sadly it was at 12.5 degrees .

For tonight it sits as is , but I will finish up the pinion adjustment tomorrow morning and get the 1350 CV installed . The old shaft had a LOT of play in the slip , I was quite surprised at how loose it was .

More to come tomorrow ... my 1.75 .120 wall dom is at the steel shop waiting to be picked up .
coilbuckets003.jpg

Tilted the pinion up and now the shocks hit . I looked at making a tera flex style shock mover , but after reading the forum I decided to grind the buckets until I outboard the shocks later this summer .
coilbuckets008.jpg

So out came the grinder .
coilbuckets002.jpg

After getting everything clearanced I put this brace on the trac bar . Hopefully it will take a little of the stress off of the mount .
coilbuckets022.jpg

I used Robert Hollis's hose clamp trick to locate the e brake cables .
coilbuckets019.jpg

All the work over the last few days was just to get this underneath the LJ .
coilbuckets027.jpg

After I double checked everything I took it out for an hour or so of Jeep therapy . No vibrations and everything was smooth . This is a little trail out back that goes up on to a knoll , nothing too exciting but its close by .
coilbuckets032.jpg

And a little flex checking the coil buckets out in the front yard .

More to come , cage starts tomorrow ? I think the honey do's are caught up ? Just cant let her know or she will make a new list .


Now its time for some father daughter fabbing .
coilbuckets035.jpg

My daughter chucked up the receiver in the mill vise . With a little coaching she got it exactly where it needed to be .
coilbuckets036.jpg

This was her first time using the drill press , she was excited to use it . Once we were done she wanted to know when she could use the plasma cutter :O
coilbuckets039.jpg

And this is why we drilled the receiver . I wanted to french the receiver in as far as I could for aesthetics , and departure angle . So I flipped the receiver on its side while I was making the bumper and this is how it turned out . As an added bonus you can make the receiver less likely to be stolen if you lock the tailgate. For me this is a moot point , as I never lock the LJ .
Somehow I lost one of the tie in brackets from the old receiver .
cage005.jpg

So I chopped this up .
cage007.jpg

And this is what it turned into .
cage003.jpg

I also needed something to attach my safety chains too .
cage004.jpg

Sawzall love equals saftery chain attachements .
cage010.jpg

Also got the cage stripped of padding and started getting it ready for some tube work .
Hopefully tommorow will be a productive day . The rain over the last few days has knocked
down the pollen and I am back in fabricating mode .
I did figure out my popping noise , it was mis-torqued control arms . Nice and quiet on the road now .
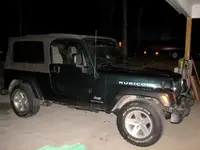
 
frontmount.jpg

First thing I did was cut the front bracket off the stock bar . A little work with the flapper wheel and the o.d. of the bracket matched the i.d. of the 1.75 tubing .
fit2.jpg

fitment.jpg

After measuring and fitting at least a dozen times the sides are in and the door surrounds fit perfect .
fit3.jpg

fit4.jpg

Passenger side in and tacked .
sideview.jpg

Drivers side in .
cagestand.jpg

Top spreader is in ! My door prop worked great to hold the cage at the correct height . 🙂
cagestick.jpg

First A pillar is in .
dashfit.jpg

Take your time with this cut .
cutthistab2.jpg

One trick me and my buddy figured out is to cut the triangle attaching point in the red circle off of the bottom of the a.c. duct . This allows you to slide the duct forward and it makes all the difference in the world getting the A pillars to fit . The diffusers are a little stiff but are still adjustable and the A pillar holds the duct in place .

If your thinking of making your own cage , be forewarned getting the A pillars in place is tough . I had awesome help and it still took 8 long hours to get done what you see above .
cagework002.jpg

It was tough to get the passengers side A pillar where I wanted it . Rather than fight the spring of the tube , I used a ratchet strap to place the base of the A pillar exactly where I wanted it .
cagework003.jpg

Whether you get a pre bent kit or make your own , this is an invaluable tool . Theres lots of brands , but this one has served me well . I use old style Lenox holesaws ( re branded as fastenals) and I can get two or three cages out of one hole saw . I use a Milwaukee Hole Hawg which turns slow , and I think that helps extend the life of my holesaws .
cagework001.jpg

This is how I make floor plates . I tack one end together so that as I drill them they stay square to each other . An added bonus is the tack welds will help you orient the plates as you install them in case they arent drilled perfectly square .
cagework006.jpg

And this is where I am as of today . Still have a few spreaders to cut and notch , then on to the back . I hope to finish it up on Monday .
http://i34.photobucket.com/albums/d150/sammi_davis/morecage004.jpg
Bending the spreaders .
morecage002.jpg

morecage001.jpg

Spreaders in place .
morecage015.jpg

morecage012.jpg

From the front .
morecage016.jpg

morecage018.jpg

Rear diagonals in place . Sadly they dont fit as well as I like so they are going to the scrap bin .
morecage023.jpg

And the Currie / Savvy ultimate setup is out of the box and ready to go in next weekend . It is BEEFY compared to the stock stuff !
morecage021.jpg

This is another project that I had bent up at the machine shop . I still need to weld the reinforcements and the sides in . Anyone want to guess what it is ?

Thats all for this week , off to NYC for another fun week of work .
 
welded010.jpg

welded007.jpg

welded005.jpg

welded001.jpg

painted.jpg

The cage is mostly complete other than some final welding and paint .
paintedcage007.jpg

paintedcage010.jpg

Trunk side templates and cut outs .
paintedcage012.jpg

trunk005.jpg

paintedcage014.jpg

paintedcage016.jpg

Heres the trunk fully welded and ready for paint .
trunk016.jpg

trunk012.jpg

trunk018.jpg

trunk019.jpg

trunk014.jpg

Trunk painted and fully installed .
trunk010.jpg

Savvy /Currie ultimate steering . The install was pretty simple and my simple alignment was close enough to get me to the alignment shop this morning . The steering is unbelievably tighter now . This is one of the few things I have purchased for my Jeep that was a direct bolt in and it worked perfectly .
Tiein002.jpg

A to Z crossmember brackets .
Tiein007.jpg

Next up was to figure out this cursed bes top under seat storage . After taking the seat out the culprit was clear . Its the fold and tumble bar thats in the way .I quickly came to the decision that the fold and tumble is almost useless on the drivers side so out it came .
Tiein009.jpg

Once the bar is cut in half a light twist will pop the two halves off of the seat frame . As thin as the tubing is I have no concerns about a loss of structural integrity .
Tiein015.jpg

Tiein017.jpg

After the tubes are removed I used vice grips to take the pivot assemblys off .
Tiein019.jpg

Use a sawzall or grinder to remove the last of the pivot .
Tiein020.jpg

You also need to cut back the front of the brackets that are under the seat sliders as they stick out . I tried bending them , but couldn't get enough clearance .
Tiein010.jpg

Tiein013.jpg

These tabs need to be flattened out .
Tiein021.jpg

This is what you will have after getting all of the fold and tumble stuff out of the way .
Tiein022.jpg

Tiein025.jpg

Tiein023.jpg

The last thing to clearance is the rear edge of the sliders . A little sawzall surgery and voila it fits !
Tiein027.jpg

Tiein028.jpg

And here it is installed . It makes for a nice secure place to keep my knipex pliers

One thing I didnt think about when cutting the fold and tumble assembly out was the reinstallation of the seat . Without the fold and tumble action the rear mounting points are not acessible to put the bolts in . With two screwdrivers you can still activate the fold and tumble so that you can gain access to the mounts . After I was done I think I figured out an easy way to still have the fold and tumble option by using a foot activated rod to tie the two linkages back together . If I decide I miss the fold and tumble then I will backwards engineer it .

This is what worked for me on my Jeep , your mileage may vary as all Jeeps are a little different . If your not comfortable cutting the brackets off the bottom dont get a bes / worse top storage box . Dont get me wrong it is nicely made and is a fair price , but it shouldnt be advertised as fitting all 97-06 TJs and LJs .
 
This is how I fixed the Savvy Under Armor buzz . It was lots of fun to drop it at the cabin on the gravel driveway . I will say it is easy to remove and all you need is a philips screwdriver and a 9/16th wrench .
0621121109.jpg

First off was to find a jeep friendly machine shop in Blanding Utah . Luckily I knew Jack Montella and his son from previous visits to Blanding . If you are in the area and need work done I highly recomend them . Fair pricing and they are durn nice people too .
0620120859.jpg

Next up was to remove the offending motor mount lift plate . If you look at it you can see the bright spot where it was hitting .
0620120910.jpg

A little mill magic ...
0620120913.jpg

Voila ! One part of the puzzle fixed .
0621121107.jpg

Next up was to elongate the holes on the front brace . The iron worker made quick work of this !
0621121542a.jpg

And with this my vibrations have ended and I no longer have to fight putting the front brace on . We removed a lot of material on the lift block , I dont know if anyone else is having this problem or if my Jeep just doesnt fit the mold . Either way it is a LOT quieter and the vibes are back to what I had from the factory .

Got both of the upper control arm bushings swapped . They would not press out so I drilled the rubber then cut the metal ring . Once it was cut I used a cold chisel to fold the ring in on itself .
controlarmbushings013.jpg

Cut out debil bushing !
controlarmbushings014.jpg

controlarmbushings011.jpg

New bushing in .

Good ol ChiCom ball joint press worked pretty good for the task . You have to take your time on the passenger side UCA as the mount isnt solid . I used a pry bar to keep pushing the halves apart as I pressed in the mount . In the near future I will swap in the Currie UCA mounts , but for now this worked great and no more clunking noise !

Before I left for out west I was worried about the rear tire wobbling on the tailgate . This is what I came up with .
controlarmbushings002.jpg

Japanese pull saw eats the rubber !
controlarmbushings004.jpg

Nice clean cut just like a Ginsu ...
controlarmbushings006.jpg

Double stacked with new hardware . This made a huge improvement on the tire wobbling until I make a tire carrier .

controlarmbushings015.jpg

And lastly the Rokmens ... If I had one more day at home I would have them installed ... I wanted to get them on today but the UCA bushings , mowing two acres , and two birthday parties seemed to take up all my time .

I got the first slider installed today . I ended up spending most of the day dis assembling and prepping for the sliders . The pictures will show you why .
100_4328.jpg

This is what was behind the stock slider . No rust , but a lot of dirt .
100_4331.jpg

A little garden hose action and it was all cleaned up .
100_4332.jpg

Once the hammerite was dry and the gaskets were applied it was time for a test fit .
100_4334.jpg

100_4336.jpg

100_4335.jpg

Most of the install was pretty straight forward . Get the center where it needs to be and then work your way out . The part that has me stumped is the blind access for holes 2 and 6 . I cant find where to access them , so I am going to email Rokmen and see if I can get some instructions. Theres also a lot of backers that dont seem to have a home .I am sure they will make more sense when I look at it tommorow morning and the heat stroke has cleared  😱

I had emailed Rokmen Sunday night asking if I could get a copy of the install directions . Jeff from Rokmen emailed me back and said to call him on Monday morning . I called him up explained that I had bought the sliders used and didnt receive any instructions . He treated me like I had just bought them from him , talked me through the install and then emailed me a pdf to check out . All in all I was shocked to receive that type of service considering that I bought them used .

Enough talking heres the last of the install pictures .

slider003.jpg

slider004.jpg

slider002.jpg

Both sliders are on and Hannah Monkey approved . Theres a lot of drilling during the install . All of the attaching points make for a solid connection.
For now I am back in NYC but when I get back I will be outboarding the rear shocks . I am also going to be ordering a set of Rokmen aluminum corners .

MCE.jpg

My wife ordered these for me tonight 🙂

In between my daughters 8th birthday party and pressure washing the house I managed to finish up the MCE install . I changed a few things from the standard install , but overall it was very easy .
flattyfenders002.jpg

First up is to cut out the template and put it in place . Once it was on I used a sharpie to outline the cut .
flattyfenders004.jpg

I used a jigsaw for most of the cutting , but up front I used the mini sawzall to cut through the brace .
flattyfenders007.jpg

flattyfenders008.jpg

flattyfenders011.jpg

The fenders come with a bracket to make the front a little more sturdy , but I decided to drill a hole into the lip of the fender and attach it to the grill shell. It is a tight fit to get a washer and nut attached , but it made the front of the fender much more sturdy .
flattyfenders013.jpg

he rear bracket wouldnt work with my rockers , so I made a set of brackets that used the factory fender flare attachment point . First I made a cardboard template , then I transferred the measurements over to a piece of steel . I used the vice and a ball pein hammer to get the bends I needed and then I bolted it all up .

My overall impression of the MCE flares is great . I bought blems , and expected odd colors or patterns on the flares . After a very close inspection I can not find anything wrong with the flares . The fit and finish is awesome , and I love how they look on the LJ . The only thing I can see being a problem for anyone installing them is the amount of fender you are cutting off . Once you cut them theres no going back . Have faith in the template and take your time cutting and all will be well . I love chopping metal so the previous sentence does not apply to me .

tub001.jpg

The curvature of the hood taunted me with sticker placement ! I was either high or low and never dead on , come to find out the hood line and the cowl line arent level to each other . I my shim the hood to get it perfect , but for now I am happy with how it looks .
tub006.jpg

This shows the lower bracket I made installed . Nothing fancy , but its one less hole to drill in the tub .

Heading home next week so its time to order some parts . This segment of the build is brought to you by The Jeep Co OP http://blackmagicbrakes.com/Jeep_Co-Op.php

I ordered a few things for my LJ .

44c06b5b69174791b82f62cc5e2e28c7.Large.jpg

21098804.png

21201447_2g70.png

ea6f336bd8456c56b31ea7f89537c348.jpg

13231906682701803488760.jpeg


When I got up this morning I knew that today would be the start of the hardcore fabbing ... Yes thats right I installed the Delrin door bushing kit from Kenneth Thompson at the Black Magic Brakes co-op . I read the directions and it mentioned using a small screwdriver or a small chisel . I tried both and none of my inserts budged . I grabbed a random bolt off of the counter top and like magic they drove right out .
jeepfabbing010.jpg

jeepfabbing011.jpg

jeepfabbing014.jpg

The doors are much smoother now , I wasnt sure if I would notice a difference but I did .
 
545548d1372557677-just-another-lj-build-forumrunner_20130118_091049.jpg

545549d1372557677-just-another-lj-build-forumrunner_20130118_091126.jpg

Winter wheeling at home . Used the winch to pull a car out of the ditch , but the LJ did just fine in the slush .
jeep_zpsfe0f9ee0.jpg

My old 76 CJ 7 .
memories_zps5190a668.jpg

The first samurai I bought .
 
IMG_20130322_185559_124_zpsce081ed5.jpg

IMG_20130322_185625_322_zps03f11878.jpg

Inner axle sleeves from Synergy . I am still waiting on shafts and ball joints . No worries , the front axle will get some attention
when I get back from Minnesota and all the parts are here .
595278d1364433712-just-another-lj-build-img_20130327_183139_006.jpg

Axle shafts for the front 44 .
1258645420626979251017.jpeg

Johnny joint upper control arm mounts .
I have all the front axle upgrade parts at the house , and this has me now looking at the rear .

New rear superiors would be $350 for a pair , plus wheel bearings . And this would leave me with the stock Rubicon air locker / lsd .

Or a Jana 44 which is $270 for the kit , $1000 ish for a 35 spline ARB and $400 for a pair of rear shafts to fit the 35 spline shafts .

Either of these options would require a set of axle sleeves which would be $100 give or take .


Or I could sell my rear Rubicon 44 and replace it with a HP 60 Rock Jock with an ARB and 35 spline shafts for $3500 .

Cost wise the rear alloys and a sleeve make the most sense . However theres the Currie rear for $2500 after I sell my Rubicon 44 .

So many choices , which way would ya'll go ?

IMG_20130415_200502_280-1_zps08bdb6f7.jpg

Synergy ball joints came in ...

621777d1372575475-just-another-lj-build-forumrunner_20130504_212541.jpg

Found a set of used upper control arms for a great deal . Thanks Jake !

1365094734204873307819.jpeg

1315524597443-1666922669.jpeg

Went ahead and ordered the other six Savvy arms from Gerald .
bushings016.jpg

JJ going in the axle .
bushings020.jpg

axlefabbing001.jpg

Fancy alignment tool .
axlefabbing009.jpg

This was tough to weld . I got flashed pretty good halfway through as my helmet sensor was blocked . Ugly welds...
axlefabbing011.jpg

Welded around the rear and I plug welded it too . More pics later .

axlefabbing012.jpg

Started the ball joints . Take the time and money to get the OTC Dodge/Jeep kit . It will make your install go much easier .
axlefabbing013.jpg

Nice empty C . I would have never have thought this would hang me up half an hour later .
axlefabbing014.jpg

axlefabbing016.jpg

Synergy sleeves going in . For $100 you get a 59% increase in axle strength . If your doing ball joints whats a little more money when you gain that much strength .

axlefabbing017.jpg

Front two plugs before being welded . I will add a few more on the back and top once I get the knuckles back on . Have to focus on getting this thing back on all four wheels .
axlefabbing008.jpg

Moreaxlefabbing005.jpg

Made some control arm skids and welded them on .
balljoints003_zps16a93183.jpg

Ever wonder how many tons of pressure it will take to pop apart a ball joint ? It popped at 15 tons .
balljoints001_zpsfab7b75e.jpg

And this is what the inside of a stock ball joint looks like . What engineer thought plastic was a good idea inside of a ball joint ? It did make it 90,000 miles so I guess its an ok design .
balljoints004_zps5cddedf8.jpg

Superior shafts assembled and ready to be installed .
balljoints008_zpsd816d3dd.jpg

New ball joints installed with the OTC kit , they went in much nicer than the one I installed without the kit .
moreaxlework001_zps3dd63fb8.jpg

moreaxlework016_zps320024c3.jpg

frontfinished001_zpse8970866.jpg

frontfinished004_zpsbf55649c.jpg

Front axle is complete  .

controlarms005_zps77ee8a5f.jpg

Rear control arms are all in and torqued to spec . Its 60lbs for the uppers and 90 for the lowers according to Currie .
controlarms006_zpse5d02b23.jpg

Went ahead and did the SHoppe mod on the gas filler . I found it easier to remove the check valve and install it in the Jeep rubber hose .
cabinair001_zps02d1115f.jpg

Mac's cold/cabin air intake .
cabinair014_zpse5aec2ec.jpg

Under the hood is cleaned up a good bit .The old air intake box will be replaced with some type of small air compressor .
The Mac's intake is complete and it is a little different than most cold air setups as it filters the cabin air in addition to
feeding cooler air to the engine . The online directions werent the best , but I figured it out and look forward to clean air for my
son who has bad allergies .
 
Frenched%20Shock%20Tower.JPG

Got some outboarding stuff from Barnes 4wd in .

IMG_20130810_205816_413_zpse6eb7454.jpg

The plan is to use the best two tires on the rear of the LJ and order two new ones for the front . The two remaining tires will go on the trailer . I thought the wheels were just aluminum rims spray painted black , as it turns out they are teflon coated . This throws a little bit of a kink in my plan of stripping them and using them on the trailer . They are a little too nice to strip , so I think I will sell them and go back on the hunt for plain aluminum rims .

IMG_20130811_193733_700_zps264347de.jpg

IMG_20130811_193708_865_zpsdde83435.jpg

IMG_20130811_193646_583_zps2956a23f.jpg

IMG_20130811_202909_211_zpsfadd6743.jpg

35 BFG KM2's mounted and flexed.
 
savvysprings001.jpg

The Savvy 3" springs are just a hair taller on the counter than the OME 942 2.5 " springs.
savvysprings004.jpg

This is the OME measurement .
savvysprings009.jpg

And this is the Savvy measurement . So the overall gain is somewhere between 5/16" and 3/8" which is not quite the 1/2" I was hoping for .
The fronts netted the same gain , but they did have 11 coils vs the 9 coils of the OME .

IMG_20130907_194607_977_zps6b39c4d9.jpg

Cardboard mock up of the cold air intake .
IMG_20130907_202406_842_zps942c47b4.jpg

Cut and contoured to the cowl .
IMG_20130907_203016_484_zps31cdcf7d.jpg

Corner is welded , but I dont have any light gauge steel to make the top out of . Once this is done I will cut the hole for the filter and brace it with angle . This way I can use a stock filter , but still fold my windshield down.
IMG_20130907_203022_579_zpsee28b3c0.jpg

If your interested in making one of your own JScherbs cool cowl is where I took a lot of inspiration from .

c6c9d49c-9ceb-429e-a033-dd8a40a9d8df_zps08727577.jpg

This is how the LJ sits as of today on 35 BFG's with 3" Savvy springs and a 1" body lift . When I went to 35s the LJ felt loose on the OME's , but the Savvy's have given the crispness back that disappeared . I wasn't sure what to expect of the Savvy springs as I have had OME's for so long but so far I am pleasantly surprised .The LJ still rides great and soaks up the bumps both big and small with no issues .

On a different note I figured out whats wrong with the trailer . I went through the list of suggestions and most of y'all guessed it right . It towed just fine behind the LJ all the way up to 65 mph with the "small" addition of a 80lb bag of concrete . So yes a lack of tongue weight seems to have been the culprit . I guess I will be purchasing the tongue box for it sooner than later now .


20131006_175753_zpsa966ca00.jpg

Heres the MB and TJ grilles laid on top of each other . They sure make for strange bedfellows . Not sure if I am going to pursue this or not , after talking to Hendrix I am considering notching my grille and sliding the winch back . This would allow me to trim the frame back the sway bar cross tube , and that would probably give me the little bit of clearance I need .

600349_10151757706242483_1959573916_n.jpg

Picked up some soft doors .
1375195_10151759378352483_828656893_n.jpg

Soft doors installed .
20131028_181122_zps5d3a8722.jpg

20131028_181152_zps46d259ba.jpg

20131028_181140_zpsa94d4bec.jpg

Heres the wheels polished and the new tires all mounted up. I refinished a set of chrome center caps , but Kimbo said it was too much ... I think I may have a problem .

rubicon2.jpg

20131028_181122_zps5d3a8722.jpg

Good before and after .
20131029_124851_zps7f8dd7ca.jpg

Its funny how a simple old dirt road can bring a smile to my face 🙂
20131029_155916_zpsc654c633.jpg

20131029_162844_zpsd40d7a6d.jpg

20131029_162824_zpsf5447c9c.jpg

Some various pictures from testing out the 35s .


20131031_135119_zps9716f21b.jpg

20131031_135302_zps25f6ff2b.jpg

20131102_163512_zpsa8c0afe9.jpg

20131102_163209_zpsef61dce7.jpg

20131102_163749_zpsd46a5ae1.jpg

As it looks currently with the almost completed trailer .

20131102_205807_zpse0202e06.jpg

The outboarding stuff is all there and ready to go in .
skidder.jpg

Blue truck and the LJ made quick work of the pine trees that fell last month .
 
Jan 3rd I am getting 5.13s installed . At least the ratio is decided ... will it be JK 44 Jantz gears ? That I am not so sure about . Still have to decide on the rear locker too . I am leaning towards a Rubi front air locker , but a Detroit would work just fine at a more palatable price point .
 
aw12345 date=1386990262 said:
ARB is couple hundred more than a Detroit and well worth the extra coin

Selectable is going back in , just need to narrow it down . Right now I am considering running the stock rear locker to keep the costs down . Now if someone out there wants to ship me an ARB its a no brainer .
 

https://www.helpavetshine.us/help-a-vet-shine
Top