You are using an out of date browser. It may not display this or other websites correctly.
You should upgrade or use an alternative browser.
You should upgrade or use an alternative browser.
Bty34 TJ Build
- Thread starter bty34
- Start date
- Featured
Hard Line Rob said:Nice work!
Thanks, I have a trip coming up in a couple of weeks and need to get this thing back on the road. I'd rather not take the backup Jeep.
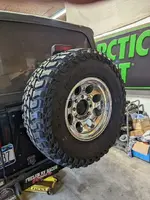
Painted the stiffener for the back edge of the skid and bolted it up. Redrilled the spare tire carrier to match the 8x170 wheels.
Attachments
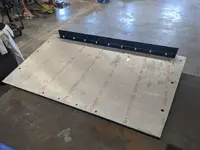
Hard Line Rob said:So the Savvy skid only drops 3/4? below the frame rails? I?ve never measured mine so I was curious.
I have 1 1/4" for the center of the Savvy skid in my notes, plus 1/4" for the skid thickness. The drop section is 14" wide out of the total 42" width. The flat one I have now is 3/4" drop all the way across and then 3/8" for the plate. Gave up some clearance at the frame rails and gained some in the middle. With a manual, the engine skid can move up to meet the new skid. The pan on an auto might limit how far up it can go.
Florpro
Well-known member
Good information thanks for posting that! [member=383]NextVentureDan[/member] makes a flat skid, but you need to massage the tub some to make it work. The main thing I like about the Next Venture unit is that it bolts in from the side so there are no fasteners on the bottom to get damaged?. But I already had the savvy stuff when I found out about his.bty34 said:I have 1 1/4" for the center of the Savvy skid in my notes, plus 1/4" for the skid thickness. The drop section is 14" wide out of the total 42" width. The flat one I have now is 3/4" drop all the way across and then 3/8" for the plate. Gave up some clearance at the frame rails and gained some in the middle. With a manual, the engine skid can move up to meet the new skid. The pan on an auto might limit how far up it can go.
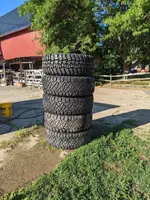
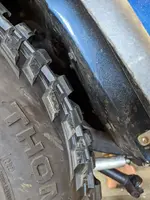
I have 35s mounted up at the moment to try and limit how much I was changing at once. I have a set of 37 Ridge Grapplers that were on the jeep when I bought it too, but they're more of an AT. The rear would need a little trimming for the 37s, the front I should have a better idea in the next week or so. It's a lot of axle for 35s but the clearance is the same as a Rubicon 44, so I don't see a lot of downside.
Attachments
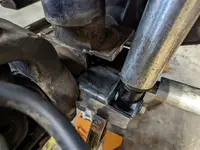
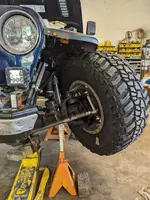
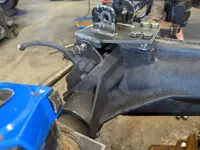
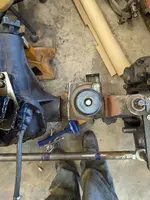
New lower shock mounts up front. On the hp30 I used tabs off the lower control arm mount. This time around I dug out the old Poly lower mounts and then extended them 1" due to the relocated spring perches. I'll probably move the lower perches back another 1/2" to center up better with the upper bumpstops.
Attachments
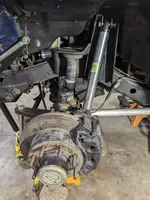
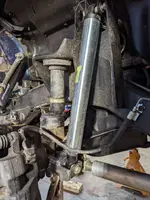
Took care of the other lower shock mount. Checked some clearances, looks like 37s would fit without any extra bumpstop. I did gain some by going from 2.5" tubes up to the 3" tubes. Welded some wheel studs in the new holes in the spare tire mount. Blank pitman arm and tie rod ends got dropped off today so I can get back to the steering.
Attachments
-
 PXL_20220831_203543424.webp80.6 KB · Views: 9
 -
 PXL_20220831_185357887.webp153.7 KB · Views: 10
 -
 PXL_20220831_185250782.webp186.8 KB · Views: 12
 -
 PXL_20220831_185235941.webp76.8 KB · Views: 9
 -
 PXL_20220831_185230713.webp221.1 KB · Views: 9
 -
 PXL_20220831_184925462.webp115.1 KB · Views: 11
 -
 PXL_20220831_175053032.webp94.5 KB · Views: 10
RokAddict85
The other Greg
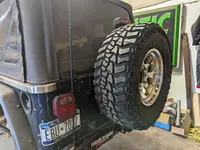
What tire carrier/tailgate brace is that and do you like it? I'm looking into options to carry a 35 for my tj project. Very cool build by the way!
It's an exogate. I've been happy with it. I put it in the same time I did the corner armor and a new used tailgate since mine was pretty rusty on the bottom edge. My tub isn't 100% in the back as it was totaled and rebuild before I bought it in 2003, which included splicing the driverside rear corner of the tub, but it had enough adjustment to close decent and I haven't had to mess with it since.
Florpro
Well-known member
I have one as well and it?s hell for stout!bty34 said:It's an exogate. I've been happy with it. I put it in the same time I did the corner armor and a new used tailgate since mine was pretty rusty on the bottom edge. My tub isn't 100% in the back as it was totaled and rebuild before I bought it in 2003, which included splicing the driverside rear corner of the tub, but it had enough adjustment to close decent and I haven't had to mess with it since.
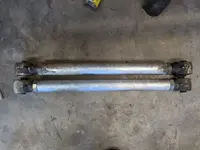
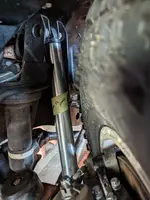
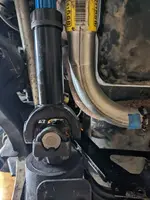
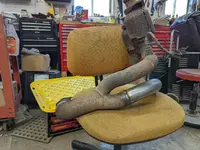
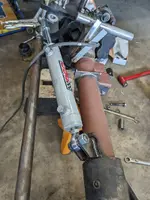
Redid a little of the exhaust for better driveshaft clearance. When the passenger side is fully stuffed, it gets within 1/8". It's going to put me about 5/8" off center at ride height. I don't know if the axle was built to use off the shelf shafts, but the pinion offset is 2" closer to center than a TJ axle.
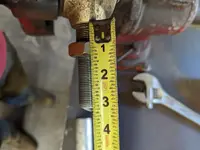
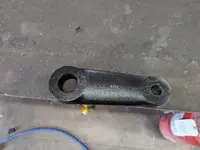
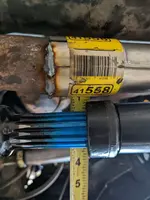
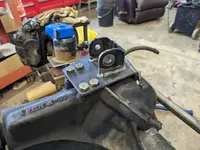
Drilled the blank pitman arm from parts Mike. Ended up at 5 3/8".
Drilled the blank pitman arm from parts Mike. Ended up at 5 3/8".
Attachments

Florpro
Well-known member
My front driveshaft rubs my exhaust but only under extreme flex?. So far there is just paint missing, but at least I know what ?that? noise is.bty34 said:Redid a little of the exhaust for better driveshaft clearance. When the passenger side is fully stuffed, it gets within 1/8". It's going to put me about 5/8" off center at ride height. I don't know if the axle was built to use off the shelf shafts, but the pinion offset is 2" closer to center than a TJ axle.
Drilled the blank pitman arm from parts Mike. Ended up at 5 3/8".
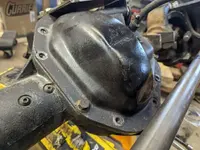
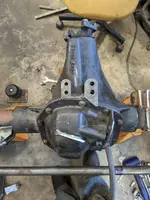
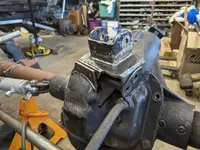
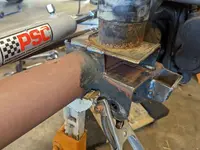
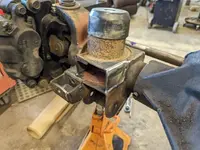
I pulled the exhaust to weld it up. Pinched it in the vise to make it a little more oval where it gets close to the driveshaft. Shouldn't rub, but might get warm. Pulled the axle to do some welding and ran out of wire. Did some more custom clearancing on the diff cover. I pulled the cover to make sure I wasn't getting carried away and I still have almost 3/4" between the backside and the ring gear.
Attachments
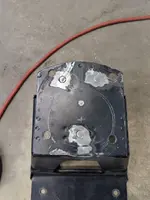
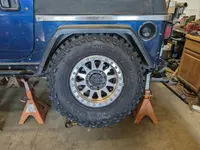
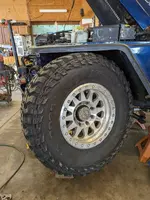
Got the spare tire mounted and up on the modified carrier. Took the beadlocks to the tire shop and got them balanced.
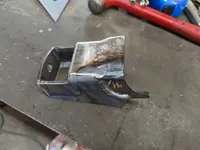
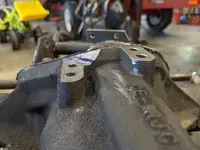
Worked on the upper link mount. Cut the angled side of the casting down to a flat surface and made a spacer to bring it up even with the other. Welded another tab to the diff cover to pick up the front of the mount.
Worked on the upper link mount. Cut the angled side of the casting down to a flat surface and made a spacer to bring it up even with the other. Welded another tab to the diff cover to pick up the front of the mount.
Attachments
-
 PXL_20220908_180505624.webp159.4 KB · Views: 8
 -
 PXL_20220908_180511457.webp171 KB · Views: 9
 -
 PXL_20220908_175728090.webp146.5 KB · Views: 8
 -
 PXL_20220908_144252236.webp151.3 KB · Views: 13
 -
 PXL_20220908_161729156.webp130.1 KB · Views: 8
 -
 PXL_20220908_154626043.webp170.5 KB · Views: 9
 -
 PXL_20220908_154614168.webp153.7 KB · Views: 9
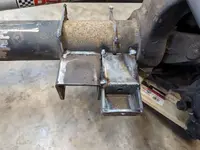
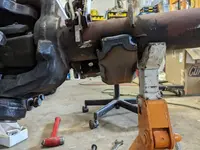
Coil buckets ended up 2 1/2" back from where they started. Added a brace to the control arm / shock mount. I debated about boxing in the back, but figured it would trap mud.
Attachments
I started with moving the buckets and the arms 1.5" to get them centered over the tubes and allow the trac bar to be straight to the inner C. Going out to 2" on the arms helped a little with driveshaft clearance. Bringing the coils mounts back the extra 1/2" centered up the bumpstops better.
With the Savvy midarm, the rear lower links are 1" longer than the fronts. I had the rears all the way in and was just scuffing the gas tank, so it worked out to swap. There was enough thread to do it with the front arms if needed. I am curious how close I am to stock wheelbase once I get it setting on its own weight.
With the Savvy midarm, the rear lower links are 1" longer than the fronts. I had the rears all the way in and was just scuffing the gas tank, so it worked out to swap. There was enough thread to do it with the front arms if needed. I am curious how close I am to stock wheelbase once I get it setting on its own weight.
Attachments