You are using an out of date browser. It may not display this or other websites correctly.
You should upgrade or use an alternative browser.
You should upgrade or use an alternative browser.
Bty34 TJ Build
- Thread starter bty34
- Start date
- Featured

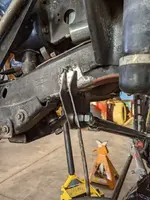
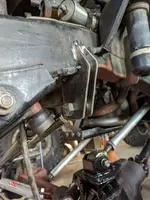
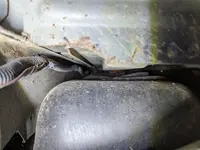
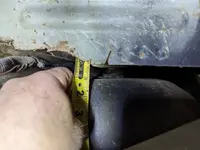
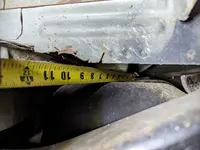
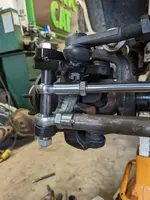
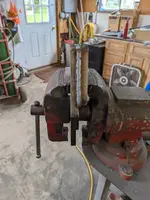
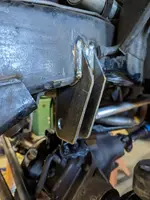
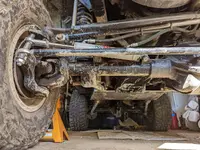
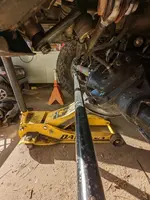
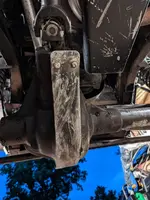
Burned in the frame side trac bar mount. Switched from the 3/16" plate mockup for the drag link to a piece of 3/4" plate. Cycled a couple times and then welded it to the high steer arm. Adjusted the axle side trac bar mount position a little bit and welded it on the the inner C.
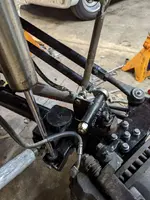
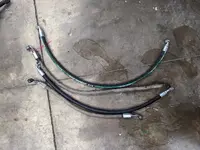
Hydraulic hoses were a couple inches short for the new location. Had a new set of hoses made up at a local shop. I wasn't able to find the field serviceable hose locally, I'll need to order some for spare.
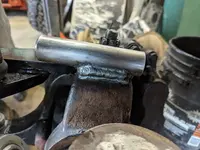
Found a spot to mount the sway loc on the axle. Doubles as somewhat of a gusset for the trac bar mount.
Getting close, need to have it on the road for an inspection to tomorrow and on a trailer Thursday.
Hydraulic hoses were a couple inches short for the new location. Had a new set of hoses made up at a local shop. I wasn't able to find the field serviceable hose locally, I'll need to order some for spare.
Found a spot to mount the sway loc on the axle. Doubles as somewhat of a gusset for the trac bar mount.
Getting close, need to have it on the road for an inspection to tomorrow and on a trailer Thursday.
Attachments
-
 PXL_20220912_232559562.webp159.6 KB · Views: 11
 -
 PXL_20220912_232346540.webp201.3 KB · Views: 11
 -
 PXL_20220912_232128367.webp169 KB · Views: 9
 -
 PXL_20220912_204746385.webp286.1 KB · Views: 11
 -
 PXL_20220912_183930894.webp131.2 KB · Views: 11
 -
 PXL_20220912_170922138.webp103 KB · Views: 9
 -
 PXL_20220912_155412232.webp119 KB · Views: 13
 -
 PXL_20220910_154837647.webp108.6 KB · Views: 10
It's moving under it's own power. Did about 20 miles to get everything to reset for the inspection from the battery being disconnected for months and it throws a code for bank 2 running lean. Hopefully I just messed up the sensor when I welded the exhaust and a new sensor takes care of it.
Attachments
New upstream O2 and 80 miles of driving to get the monitors to reset and we have a new inspection sticker.
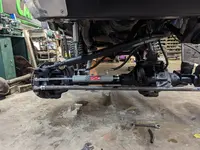
Back when I moved the rear coil buckets in the frame, I purposely raised them as high as I could figuring it was easier to add spacers. I previously doubled up the rubber isolators to makeup for it a little bit. I was still a little low with the kids in the back, so I pulled the isolators and added a 1" spacer. The center needed to be opened up to work with the Currie bumpstops.
Ended up with 6" of up travel at each end and 21" to the bottom of the frame. If I notch the bottom of the tub for the rear upper arms I could gain another 1/2" in the back, but that will be for another day.
This winter I'll need to remount the antirock behind the axle, but I need to drop the tank to do that due to how close the tank sits to the tub.
Attachments
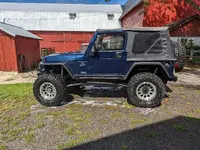
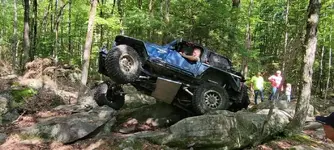
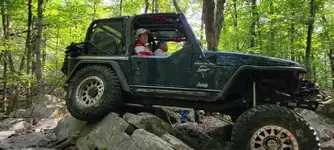
The Jeep survived it's first outing without any real surprises. The first day we struggled a little. It was in the low 40s when we started and I took the tires down to 8 psi. As it warmed up, I was up to 10 by the end of the day. On the 15" rims I normally like to run 7 but it was the first time out on the 17s. Terrain was a little more loose and muddy. Wasn't bad, but struggled to get out of holes left from the guys on 39s and 40s ahead of us.
Second day we went down to 7psi like normal and checked it a couple times over the course of the day to make sure it didn't climb. Trails were less muddy and more rocky and things went better. We were the only ones on less than 37s, but I felt like we held our own.
Not a fan of the rear Detroit. There were a couple of times I wasn't able to hold a line that I thought I should have been able to. I normally spend 90% of my time with the rear unlocked. At some point it will get switched to a selectable.
Going from a crawl ratio of 53 to 108 is quite a change. Sometimes the extra momentum works out when it's slick, but the added control at low speeds is nice and my knee feels better at the end of the day. Messed around a couple of times with front digs with some success which was kinda cool.
Overall pretty happy with it considering how much was taken apart and redone since last time it was out.
Attachments
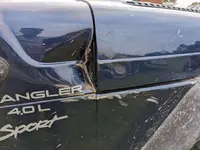
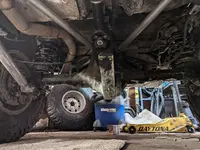
Skids on the axles have some drag marks. Managed to bend the tie rod. I think I remember backing off a rock and dropping onto it. I'll rotate it 1/4 turn for now and straighten it when I pull things apart to paint this winter.
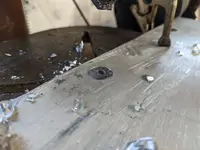
Skid held up ok. There was one mark from contacting a bolt head on the bottom of the Atlas. Made some relief with a flap wheel on the back side. The countersink I had in hand when I originally made it was only 13/16 and not quite enough for the 1/2" bolts. Borrowed a larger countersink and opened them up.
Skid held up ok. There was one mark from contacting a bolt head on the bottom of the Atlas. Made some relief with a flap wheel on the back side. The countersink I had in hand when I originally made it was only 13/16 and not quite enough for the 1/2" bolts. Borrowed a larger countersink and opened them up.
Attachments
-
 PXL_20220928_210019992.webp96.6 KB · Views: 11
 -
 PXL_20220928_210010060.webp81.6 KB · Views: 12
 -
 PXL_20220928_204355951.webp296.8 KB · Views: 13
 -
 PXL_20220919_202239858.webp283.4 KB · Views: 9
 -
 PXL_20220919_202103824.webp236.9 KB · Views: 11
 -
 PXL_20220918_232719643.webp126.3 KB · Views: 11
 -
 PXL_20220918_232700936.webp156.1 KB · Views: 10
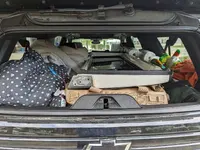
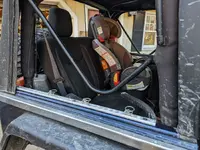
Had some pieces of Mac's tie down track laying around from a previous pickup. Cut a piece in half and mounted to the tub. Was able to reuse two of the hard top holes and added one new one per side. Since I normally have two kids in the back when wheeling it should help them keep their stuff secured.
Attachments
Florpro
Well-known member
I have a few of those in a box I bought off Uncle Greg a few years ago?. I was thinking of doing a similar thing.bty34 said:Had some pieces of Mac's tie down track laying around from a previous pickup. Cut a piece in half and mounted to the tub. Was able to reuse two of the hard top holes and added one new one per side. Since I normally have two kids in the back when wheeling it should help them keep their stuff secured.
Started looking at what it is going to take to get my rear antirock back in behind the axle. Mounting in front of the axle never worked out as well as I would have liked since the arms needed to cross over the axle. I think my tank may be sitting a little high as it's touching the bottom of the tub.

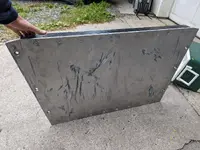
The bottom of my skid may be pushing it up a little bit.


At some point I need to pull the skid and flatten it back out and get the cracked corner welded.

Anyone have a less massaged Savvy skid to see how close it is to the tub?
The bottom of my skid may be pushing it up a little bit.
At some point I need to pull the skid and flatten it back out and get the cracked corner welded.
Anyone have a less massaged Savvy skid to see how close it is to the tub?
Rock rash graffiti!!
There was a tall tired JK parked at the local taco joint last week sporting a rear anti rock. It's been said discoing the stock rear bar doesn't help flex, making one question how much true gain exists having it connected. Clearly you're a fan of the anti rock. I suppose this should come as a two pronged question: do you think a stock rear sway bar does....anything at all? Being anti rocks are known dollar grabbers, how would one justify the caps spent (is it truly an improvement)? To be clear there are no negative connotations intended here. I'm curious for more info!
There was a tall tired JK parked at the local taco joint last week sporting a rear anti rock. It's been said discoing the stock rear bar doesn't help flex, making one question how much true gain exists having it connected. Clearly you're a fan of the anti rock. I suppose this should come as a two pronged question: do you think a stock rear sway bar does....anything at all? Being anti rocks are known dollar grabbers, how would one justify the caps spent (is it truly an improvement)? To be clear there are no negative connotations intended here. I'm curious for more info!
That's a fair question. I never had any complaints with the stock rear bar except it was a rock magnet. When I did the 4 link in the rear it was going to be in the way, the bar was twisted from rock contact and the mounts had taken a beating. In that case I think the antirock makes sense. Now with the 60 in there, a stock bar really isn't an option.
Running without it this fall there have been a couple of times the Jeep didn't behave how it did before. I'm not sure how much of it is switching to an auto locker in the rear vs the missing rear antirock. Since the antirock is sitting in the corner, I'll see what that does first.
Running without it this fall there have been a couple of times the Jeep didn't behave how it did before. I'm not sure how much of it is switching to an auto locker in the rear vs the missing rear antirock. Since the antirock is sitting in the corner, I'll see what that does first.
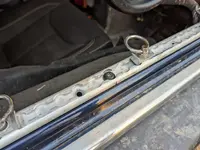
Here's the stock arrangement. Tough to tell from the pictures, but it is between 3/4" and 7/8" between the top of the tank and the bottom of the crossmember on the tub.
Attachments